- Begin by gathering a few simple components:
- 1K resistor
- A NPN transistor
- A ferrite toroid
- Two pieces of differently colored enameled wire
- Red and black insulated wires
- Dead batteries
- A small PCB board (optional)
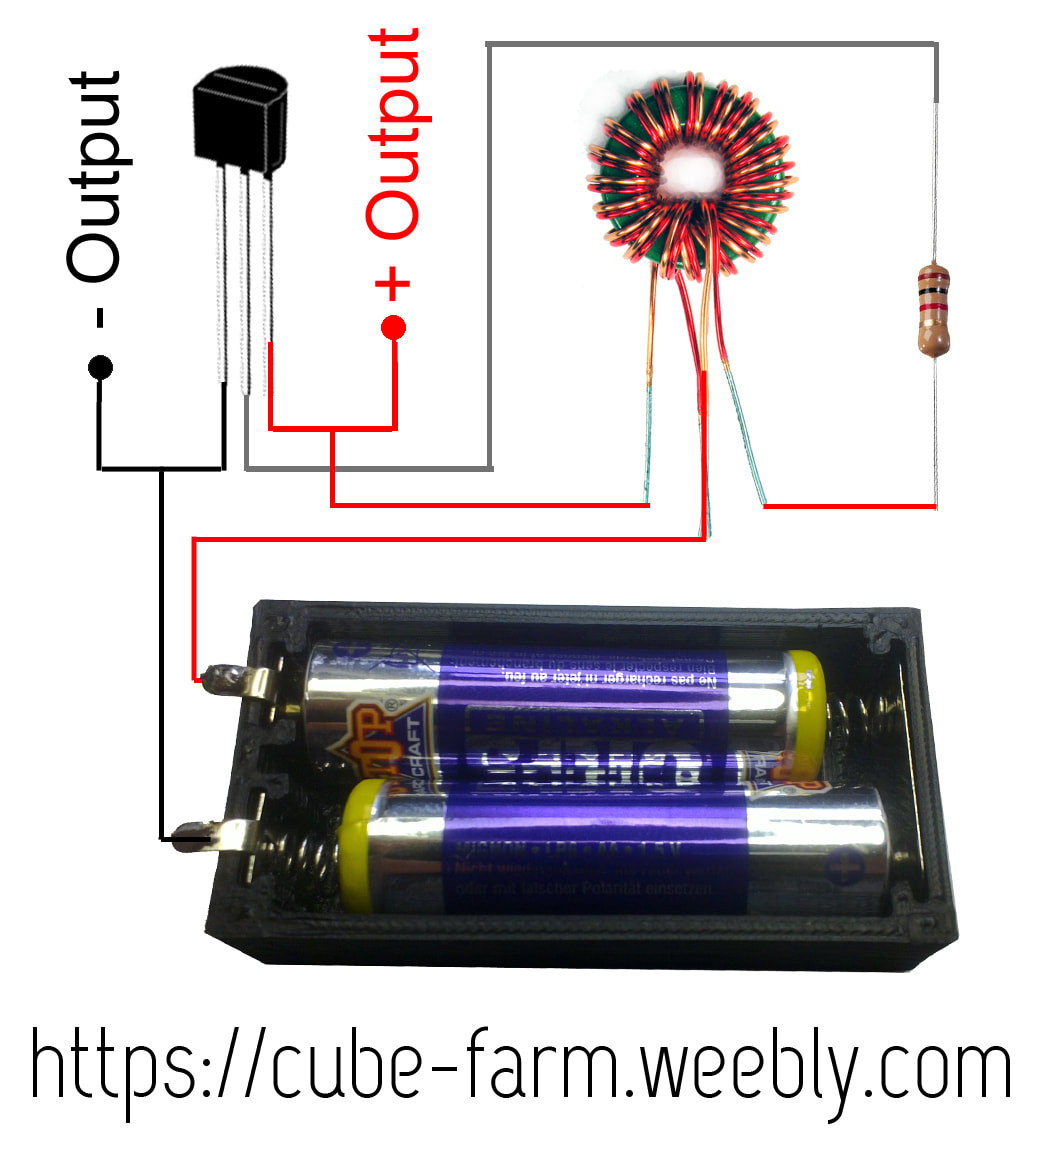
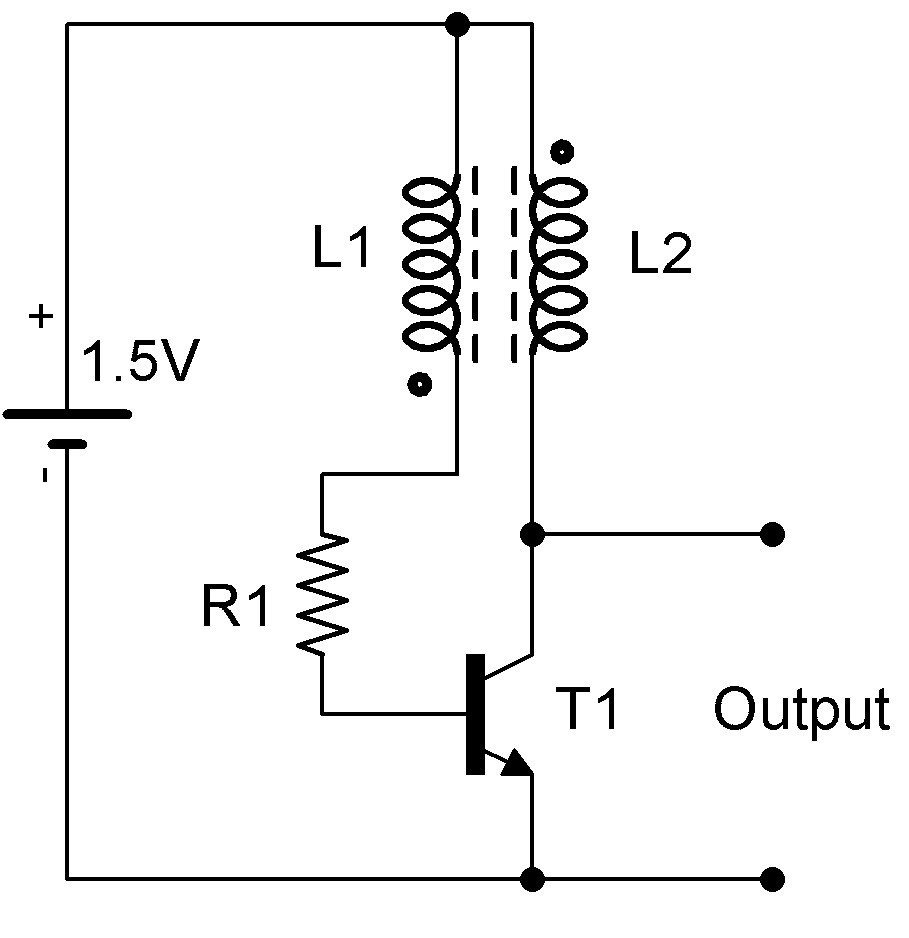
- First Wind your toroid with your two lengths of enameled wire. After winding it, connect one end of one colored wire to one end of the other colored wire and solder them together. You can also wrap your toroid with just one color of wire but it will be easier to identify the separate wires if you use two.
- Solder together one of the single wires wrapping your toroid to the COLLECTOR pin of your transistor as well as a length of red insulated wire. This will be the positive terminal to power your LED Grow Lights.
- Solder the other single wire coming from the toroid to one end of the resistor and the other end of the resistor to the base of the transistor.
- The emitter is your ground connection so you will solder two black wires to it, one will go to the negative terminal of your batteries and the other will go to the negative terminal of your LED Grow Lights.
- The pair of connected wires coming from your toroid will go to the positive lead of your batteries.
- As an additional note, you can make one of these circuits with a 3 hole connector attached to it, where the transistor should be, so that you can test salvaged transistors to see if they can be used in future Joule Thief circuits.
|
|
